


How to Create a Database Using JDBC
Learn JDBC and create a “Hello World” JDBC database application. This JDBC tutorial can be used for any products that have JDBC drivers, including MySQL, Oracle and RaimaDB’s
Before you Begin
There are a few things you should make sure you understand/obtain before you begin. Take a look below:
- Starting up a command prompt in Windows or Linux.
- JDK 1.6 or greater installed and ready to go.
- Determine whether the JDK on your system is 32 or 64 bits. To do this, run “java-version” in a command prompt. If it is 64-bit, it will say so in the output. Otherwise, it is 32-bit.
- A text editor.
- A JDBC Database Driver contained in products such as MySQL, PostgreSQL or RaimaDB.
Steps to Creating your Application
A prepackaged sample using Raima’s JDBC driver and the RDM database management system can be found in the demos section. Select the “Hello World” Windows or Linux package that matches your operating system and JDK (32 or 64 bit). You may select the other samples after finishing this tutorial, as they show increasingly complex usages of databases through JDBC.
Install the package into a new local directory. For reference, we will call this directory “/HelloWorld_JDBC”. The full source code for HelloWorldJDBC.java can be seen here.
Step 1 Open a command line prompt
Step 2 Viewing your .java file
Using your text editor, view the file “HelloWorldJDBC.java”. Alternatively, use our online copy.
Step 3 Viewing your sample class
					public class HelloWorldJDBC {
…
}
This class is a public class because it has the ability to be accessed outside the scope of this class. In this example everything is done within this class.
Step 4 Examining the main method
The main method is the entry point for your program. For this simple example, we are only using one .java file. Therefore, the class will contain the main method as shown below. For this example, we will throw the outermost SQLException (The exception related to the Connection object) for simplicity.
					public static void main(String[] args) throws SQLException {
…
}
Step 5 Creating and initializing your Connection Object
You will initialize your Connection object before you have access to any of the methods it contains. You will retrieve the connection object by calling a method from the DriverManager class called getConnection(). The return from this method is your Connection object.
It is good practice to start a new try block for every object that you initialize. When you are done with the object, simply add a finally block that performs the corresponding close() method, and the outermost block will contain your catch block to handle all possible SQLExceptions. This will be easier to see with the full code.
*Note: The URL will change depending on the Driver you are using, in this case, the RDM JDBC driver is being used.
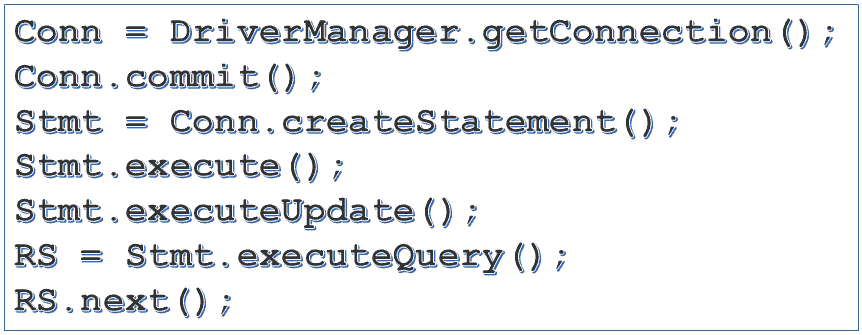
					Connection Conn = DriverManager.getConnection(“jdbc:raima:rdm://local”);
try {
…
}
} catch (SQLException exception) {
…
} finally {
Conn.close();
}
Step 6 Creating your Statement Object
The newly created Connection object Conn has a method in it called createStatement() that will return a Statement object. You will then use with this Connection to the database.
					Statement Stmt = Conn.createStatement();
try {
…
} finally {
Stmt.close();
}
Step 7 Execute Statements to Create or Open the Database
Using the Statement object Stmt you just created, you can execute several different methods depending on the type of statement you want to execute. For example, if you would like to execute a SQL statement such as “OPEN database_name” or “DELETE * FROM table_name” you would perform a Statement.execute() method. You can see execute() used in the code snippet below. In this example, we will create the database programmatically. In this example, the database is trivial, consisting of a single table named hello_table containing a single character column named foo. The sequence will create a database if it doesn’t yet exist, or just open it if it does exist.
*Note: This database is created programmatically. There are tools out there to create your database separately from your program. View a quick “How to Create a Database with SQL” tutorial on how to do this.
					try {
Stmt.execute(“CREATE DATABASE hello_db”);
Stmt.execute(“CREATE TABLE hello_table (f00 char(31))”);
Conn.commit(); // now the database physically exists
} catch (SQLException exception) {
// we are here if database exists
Stmt.execute(“OPEN DATABASE hello_db”);
}
Step 8 Inserting a new Row using the Statement Object
To insert a single row into this database, we use the executeUpdate() method, which is used for complete (unprepared) INSERT, UPDATE or DELETE statements. This implicitly starts a transaction, which will be one unit of update work applied to the database atomically. One INSERT is shown below, but more could be added at this point.
Stmt.executeUpdate (“INSERT INTO hello_table VALUES (”Hello World”)”);
Step 9 Committing Changes
In order to have your changes finalized in the database you must perform a transaction commit. In JDBC this is done through a method in the Connection object. The method we will be using is Connection.commit() and that will finalize any changes you made during a transaction.
Conn.commit(); //Commits all changes
Step 10 Creating your Result Set Object (retrieving data from the database)
In JDBC, when you want to retrieve data from the database, you perform a SQL SELECT statement using your Statement object with an execute method that returns a Result Set object. This method is called Statement.executeQuery(). This means it will execute the specified Query and return the Query results in the given Result Set.
					ResultSet RS = Stmt.executeQuery(“SELECT * FROM hello_table”);
try {
…
} finally {
RS.close();
}
Step 11 Accessing the Result Set
In order to access every piece of data in your Result Set, you must iterate through it. A method is provided within the Result Set to check if the next result in the Result Set is NULL, meaning no more data. If the method ResultSet.next() returns TRUE then there is data in the database and you can retrieve it from your result set.
To access the data inside the Result Set you must perform a getter method. There are numerous getter methods available to retrieve the specific data type from the Result Set. In this example we want a string, therefore we use the ResultSet.getString() method, with the parameter being the column (first/only column is 1) you are retrieving from.
Take a look at the code below to see an example of how this can be done.
					while(RS.next() != false)
{
System.out.println(RS.getString(1));
}
Step 12 Deallocating Resources
Here you will deallocate all of the resources you used above. In this case, your resources are each object that you used above, being your Connection object, Statement, and Result Set objects. For each nested try block you will have a finally block, which performs the corresponding close method. These statements have been shown in context above, but here are the cleanup calls in sequence from the code.
					} finally {
RS.close ();
}
} finally {
Stmt.close ();
}
} catch (SQLException exception) {
System.err.println (“SQLException : ” + exception.toString ());
} finally {
Conn.close ();
}
Step 13 Final Catch and Finally block
The very last block contains both a catch block and a finally block. The catch block determines what to do if an exception was thrown in the code above. In this case just displaying the exception to standard out is sufficient. The finally block will be executed regardless of an exception being thrown. Here we will deallocate our Connection object. In this example, if your Connection object does throw an exception for some reason, it is “thrown” out of the method. In a normal situation you could either add another try catch block, or declare this program as a separate method and handle it elsewhere.
					…
} catch (SQLException exception) {
System.err.println(“SQLException : ” + exception.toString());
} finally {
Conn.close();
}
…
Step 14 Compiling your application
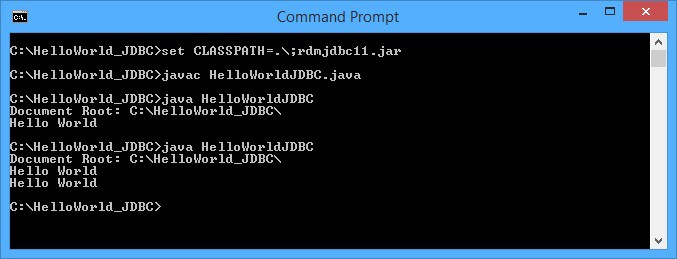
If your JDK is installed correctly you should have access to the Java Compiler, called javac. In order to have your program successfully compile, you must first set your CLASSPATH to contain all of your class files, including .jar files that you are using. Since the JDBC driver is usually a .jar file, you will need to include this in your CLASSPATH. If you are using command line you will perform operations similar to this:
Linux:
					CLASSPATH=$CLASSPATH;{Current working directory};{Direct Path to .jar file}

CLASSPATH=$CLASSPATH;/home/users/kevin/workspace/;/home/users/kevin/workspace/rdmjdbcJDK8-14.jar
*Note: ./ can be used to signify current working directory
Windows:
					set CLASSPATH=%CLASSPATH%:{Current working directory}:{Direct path to .jar file}

set CLASSPATH=%CLASSPATH%:C:userskevinworkspace:C:userskevinworkspacerdmjdbcJDK8-14.jar
After you have set up your CLASSPATH you should be ready to compile. In order to do this, you must use the javac compiler. The compile will be the same on all platforms. The format looks like this:
javac {main_class.java (entry point to program)}
javac HelloWorldJDBC.java
					HelloWorldJDBC.java
HelloWorldJDBC.class
Step 15 Running the program
Running the program is as simple as typing “java {executable name}”. In this case you would have “java HelloWorldJDBC” as that is the entry point to your program. If everything works as expected you should see something like the following as displayed in a Windows Command Prompt:
Done!
Congratulations! You have just finished your first JDBC application. Now that you have “gone to the disk and back” with JDBC, you may be encouraged to examine some more sophisticated samples. The remainder of the JDBC Demos becomes a step-by-step tutorial, which includes transaction commits and rollbacks, and multi-way relationships between tables. Each sample should be quick, informative, and completely disposable when you are done.